Most of us have all experienced the regret of accidentally deleting a photo we love. Thankfully, recovering deleted photos is not difficult if you find the right solution and act in a timely manner. The methods below will come in handy when you need the deleted photos back.
Part 1. How to recover deleted photos on Windows PC without using software
1.1 Get back deleted photos from Recycle Bin
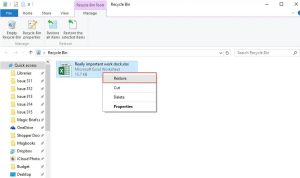
Whether you press the Delete key or if you right-click and then choose “Delete” a photo on Windows, your photo will be dumped into the Recycle Bin. Recovering deleted photos is simple if you can find them in the Recycle Bin.
Step 1. Double-click the Recycle Bin icon to open it.
Step 2. Find the deleted photos or other types of files you want, right-click on a file, and select Restore from the context menu.
But deleted photos will not appear in Recycle Bin in these conditions.
- You manually deleted some images from the Recycle Bin, or you emptied the Recycle Bin to delete all items.
- You pressed Shift + Delete on your keyboard to permanently delete the selected photos.
- You deleted the photos from your external storage media.
- When you are editing or transferring some photos, unforeseen power outages, virus attacks, or malfunctioning software can sometimes cause the photos to get lost.
1.2 Two Methods to recover permanently deleted photos from Windows backups
A. Recover deleted photos through File History (on Windows 8 / 8.1 /10)
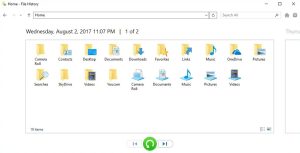
File History allows Windows users to back up computer data and then recover a specific copy of the file from previous backups. If you have backed up the photos using File History beforehand to an external device, such as a USB flash drive or portable hard drive, please connect that storage media to the PC, then restore permanently deleted photos on Windows like this:
- In the search box on the taskbar, enter “Restore files”, and then select Restore your files with File History to view the File History’s entire backup collection.
- Search for the photos you need, then use the arrows to see all versions of each file.
- When you find the version you want, select “Restore” to save the photo to its original location.
B. How to recover deleted photos via Backup and Restore (on Windows 7)
In order to safeguard your files against data loss on Win 7, you can use the Backup and Restore feature.
- Open the Start menu on the Windows 7 computer -> select Control Panel in Windows System -> then select Backup and Restore.
- If Windows backup feature is enabled and you have backed up your photos earlier, please hit “Restore my files” and follow the instructions to get back the deleted photos.
Part 2. Guide to recovering deleted photos on a Mac computer without software
2.1 Recover deleted photos from your Mac’s Trash Bin
On Mac OS, you can delete an item with “Move to Trash” option. However, you sometimes cannot locate the deleted photos in Mac’s Trash, examples are:
- All items are emptied from Trash on Mac.
- You choose “Delete immediately” to remove the photos from Trash.
- You pressed Option + Command + Delete keys together, instead of the usual Command + Delete to delete the photo.
- When the option “Remove items from the trash after 30 days” was enabled on your Mac, and the deleted photos have been staying in the Trash for over 30 days.
If you can see the deleted photos in Trash, you can recover them on Mac without effort.
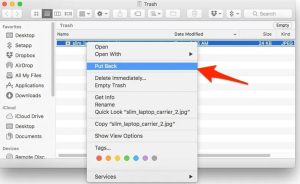
- Open the Trash on your Mac’s dock.
- View the image file you deleted, right-click every photo you want to restore, and choose “Put Back”, then you’ll find the image in its original location.
2.2 Restore deleted photos from Time Machine backups
For Mac users who want to automatically save their personal data and system files, Time Machine is a fantastic backup solution. You can restore your deleted images if you have configured Time Machine to back data to an external storage device.
- Connect your Time Machine backup device to your Mac computer.
- Open the folder that contained your deleted photos recently.
- Click on the Time Machine icon in the menu bar, then select “Enter Time Machine”.

4. Use the up/down arrows to carefully view the items in the backup folder and find the older versions of the files, you can see many snapshots of this whole folder and how the folder changes over time.
5. Select a photo, and double-click it to preview the content. If that is the file you need to get back, click “Restore”.
Part 3. How to recover deleted photos with photo recovery software?
If the deleted photos are not appearing in the Trash or Recycle Bin, and you did not create a local backup or online backup, you can try professional file recovery tools to get the deleted photos back.
After a test, we find iBoysoft Data Recovery is a good-to-use photo recovery program that can perform an in-depth disk scan and effectively retrieve all types of photos, emails, and other files. Besides, it fully supports RAW drive recovery, external hard drive data recovery, SD card recovery, USB flash drive data recovery, etc.
To recover deleted photos, please download iBoysoft Data Recovery for Windows or Mac on your computer, install the program go through the following the steps below:
Step 1. Launch the program and choose the drive from which you deleted some photos.
Step 2. Click the “Next” button, iBoysoft Data Recovery will start searching for the lost photos. (A small tip: checking the “Deep scan” option will help you find more files.)
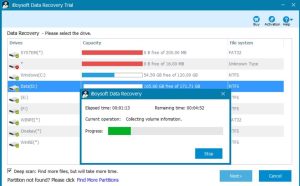
Step 3. After scanning is done, you can view the results and preview the recoverable photos, choose each photo you need. At last, click the “Recover” button.


