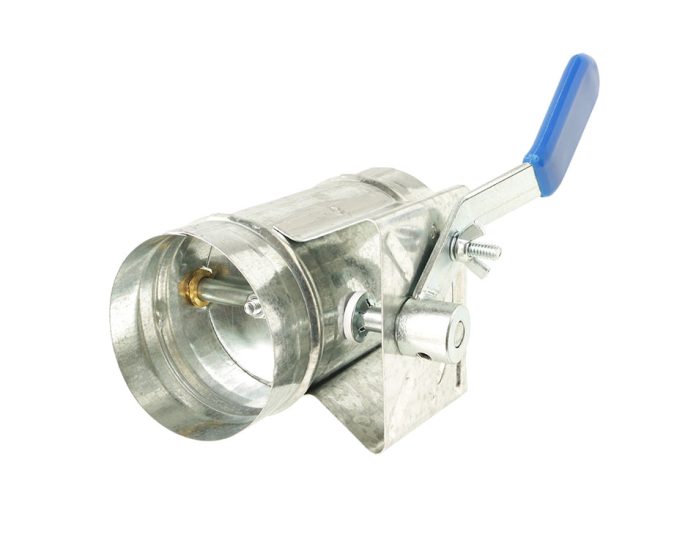
HVAC dampers are a great way to improve the energy efficiency of your home or business. But before you install or adjust one, it’s important to be aware of the potential safety hazards involved. In this post, we’ll walk you through the process of safely installing and adjusting an HVAC damper system. Get step-by-step instructions on safely installing and adjusting a new or existing damper system in your home or business. Discover the best tools and techniques that will help you get the job done quickly and correctly. Enjoy better control over airflow with this helpful guide.
Preparation for installation of an HVAC damper system
Preparing for the installation of an HVAC damper system is essential for a successful outcome. This preparation begins with familiarizing yourself with safety protocols, such as wearing protective eyewear and gloves when handling any sharp objects or pieces of metal. Additionally, you will need to ensure that you have all the necessary tools and equipment for the job, such as ladders, screwdrivers, wrenches, and power drills. Furthermore, it’s important to plan out your installation process so you know exactly how many dampers need to be installed and where they should be placed. Before installing or adjusting a new or existing HVAC damper system, the first and most important step is to make sure the power to the HVAC unit is completely off. This can help streamline the installation process and reduce potential mistakes.
If you’re unsure about what to do here, checking in with a licensed electrician would be wise. It’s vital to ensure safety and minimize potential hazards, so taking that extra precaution is never a bad thing. With the power safely off, you can proceed confidently with setting up your Braeburn HVAC dampers.
Choosing the best location for your damper system
Finding the best place for the ewc dampers in your home can seem tricky, but if you know what to look for, it’s surprisingly simple. Generally speaking, these systems are located in two common places – the attic and crawl space. Before exploring either of these locations, get appropriate clothing and supplies so that changing the settings is safe and easy. Start by inspecting your ceiling around installation points and checking any access hatches for proof of system existence. If you cannot find any signs of a damper system in your ceilings, then head over to any possible crawl spaces around your home and proceed with caution! Following safety protocols is essential when navigating through challenging and unfamiliar terrain, so be sure to put on your protective gear before starting work on locating the damper system.
Following the instructions of an HVAC damper system
Whether you’re retrofitting your home with a new IO HVAC controls dampers or replacing an existing one, proper installation and adjusting are key to ensuring the system work optimally. Thus, all steps must be undertaken with care and according to the manufacturer’s instructions. A step-by-step approach allows for a smooth and safe installation. And once complete, make sure you test the system for performance before powering it up—it’s just good sense! So, if you’re ready to install or adjust a new damper system in your home, follow the instructions that come with it for the best results.
Adjusting an existing damper system
Adjusting an existing damper system is a lot simpler than it might seem, particularly if you’re considering a heating system replacement. With just a few simple steps, you can adjust the settings and create comfortable airflow throughout your home. First, identify where the adjusting screws are located. Once these have been located, use a flathead screwdriver to loosen or tighten them until they are set at the desired position. This will allow the dampers to control airflow with ease and precision, allowing you to comfortably enjoy the temperatures in any given area of your home. Keep in mind though, that before you make any adjustments on your own make sure to check any manufacturer’s instructions for safely doing so – some steps may vary from the brand.
The final step of the installation process
Completing the installation of your HVAC damper system is the final step before testing out its effectiveness. You have to adjust the dampers for optimal airflow. This will involve making sure that the dampers open and close correctly, as well as adjusting the angles of the louvers in order to achieve maximum comfort levels. If a professional installation has been done, then this step should be relatively easy. However, if you are installing the damper system yourself, it might take some practice and experimentation to get it right. Additionally, make sure to not overtighten any bolts or screws when tightening adjustments, and make sure that all safety measures are followed throughout this process. Once everything is set up correctly and tested for operation, you can enjoy improved comfort levels and energy savings from your new HVAC damper system!
Conclusion
Now you know how to install and adjust an HVAC damper system safely and easily. Just remember to turn off the power to the unit before you begin, locate the damper system in your home, follow the instructions if you’re installing a new system, and use a screwdriver to loosen or tighten the screws until it’s set at the desired position. Once you’ve finished making your adjustments, turn on the power to the unit and test out the new settings.


