


Are you curious about how to remove duplicate files from Windows 10? Are you desperate for the best duplicate file remover for Windows 10? Well, here we go.
Every Windows user wants to get rid of excessive duplicate files. These files are compiled and take up most of the space on your PC. In fact, it makes you ache when you see it, especially when you need free space.
However, you can remove duplicate files in Windows 10 using some software as well as the Windows 10 settings. Duplicate files are a lot more complex than they look. Sometimes, getting rid of duplicate files can be a big problem. It makes you crazy with the same error again and again when you try to remove it.
So if you are stuck with these files, then today, we have brought the best free duplicate file remover for Windows 10. So go find and remove duplicate files in Windows 10. Some software and ways to remove duplicate files from Windows 10 are the following.
Part 1: Using Tenorshare Duplicate File Deleter to Remove Duplicate Files [3 Steps]
If you are looking for the easiest duplicate file deleter, then Tenorshare Duplicate File Deleter is the one you are looking for. Duplicate files of any type, whether Windows-based, USB flash drive files, SD card external hard drives, or others, can be removed.
The Tenorshare uses the advanced MD5 Message-Digest Algorithm to find duplicate files.
Features of the Tenorshare Duplicate File Deleter:
- Tenorshare supports all file types, which include images, videos, audio files, documents, and more.
- It can support external storage.
- Tenorshare uses smart algorithms like MD5 to find and remove duplicate files.
- It provides a rapid and accurate scan.
- It is secure and very easy to use.
The guide below will guide you on how to find and remove duplicate files in Windows 10.
Step 1:
All you have to do is to download the Tenorshare Duplicate File Deleter on your PC. After downloading it, install the setup and launch the application. Afterward, you will see a “Click to Add a Folder” option on the front page.

Step 2:
Then click the + button to select the disc or file. Then you’ll be provided an option to customize your file searching. You can set the file size for searching and decide whether to delete the files permanently or move them to the recycle bin.
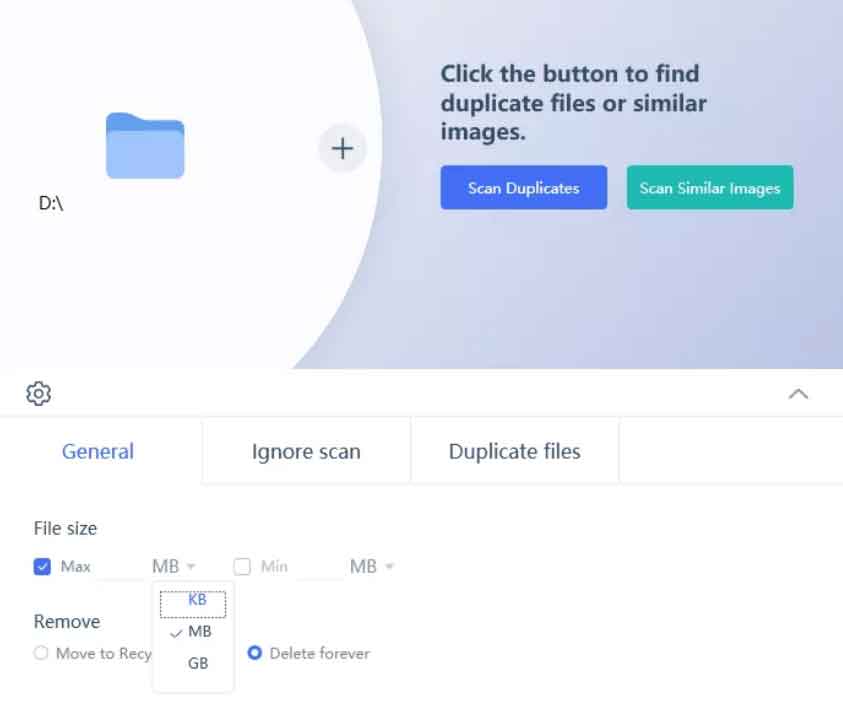
If you want to exclude a folder, then click on the three horizontal dots in the aisle of the excluded path. You can exclude the folder there. Moreover, you can choose the file types like images, videos, and other documents.
When you are all set, just click “scan duplicates,” and the scanning will start. The scanning will depend on the data size you have selected in the folder.
Step 3:
When the scanning is done, the tensor will list all duplicate files. You can preview the files by clicking the eye icon. If you want to auto-select, then click on auto-select and simply click remove to delete them.

Part 2: How to delete duplicate files on Windows 11/10 without software:
Most of the time, the solution to the problem on the PC is right in front of us. But we still can’t find those. These are some of the best ways to find and remove duplicate files in Windows 10. These are
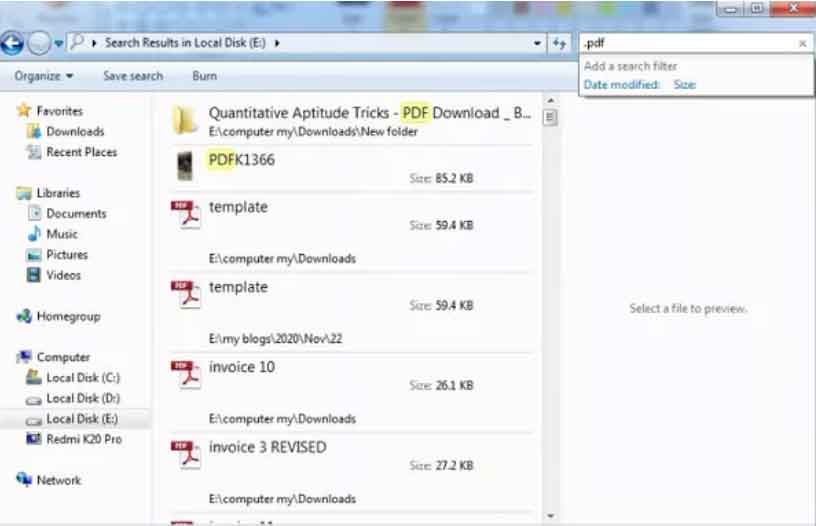
Fix 1: Use the Search Bar Features:
You can easily find duplicate files through the search bar feature. Click Windows + E to open a file explorer. You will find a search bar in the top right corner. Now type in the exact file name of the duplicates you are looking for. Afterward, all the files with the same name will show up.
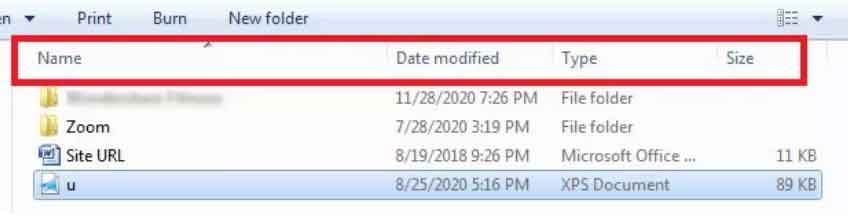
Fix 2: Check the Explorer Details Pane
You can solve the problem of duplicate files by using the explorer details pane. After opening File Explorer, you will see a pane on the right top. The parameters’ name, modified date, and type size are displayed when you click on them. You can choose those parameters to find the duplicate files.
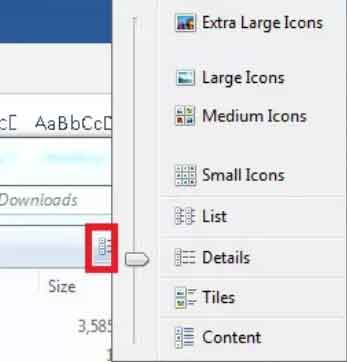
Fix 3: Check Windows Explorer Views
Windows Explorer has an option to view. It provides the data stored on the system. You can select large, small, medium, and extra-large icons, list details, tiles, and content. It can help identify duplicate files easily.
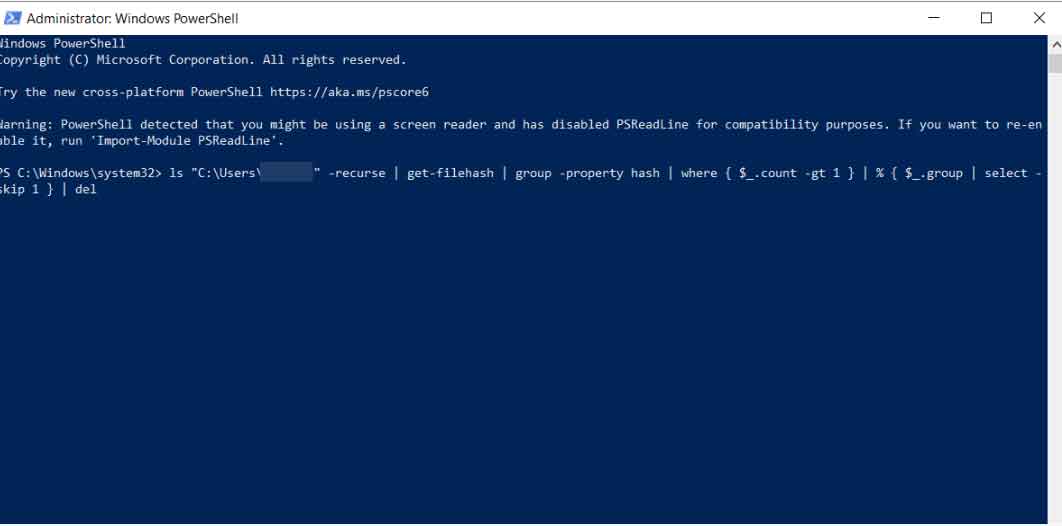
Fix 4: Using Windows PowerShell
Here’s how you can use PowerShell to remove duplicate files on Windows 10.
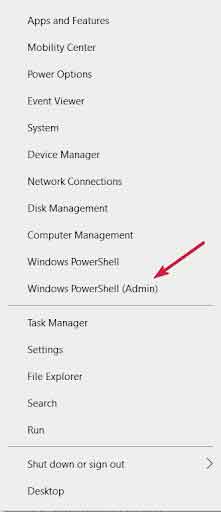
- Right-click on the window or start button. Then select Windows PowerShell.
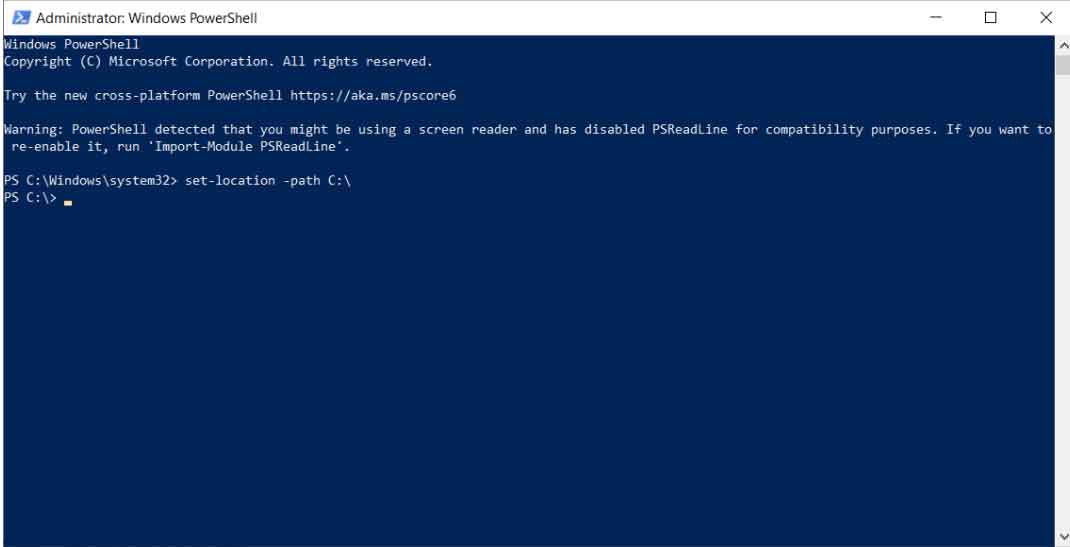
2. Then type or paste the command to set the location where you want to find duplicate files and enter it to run it.
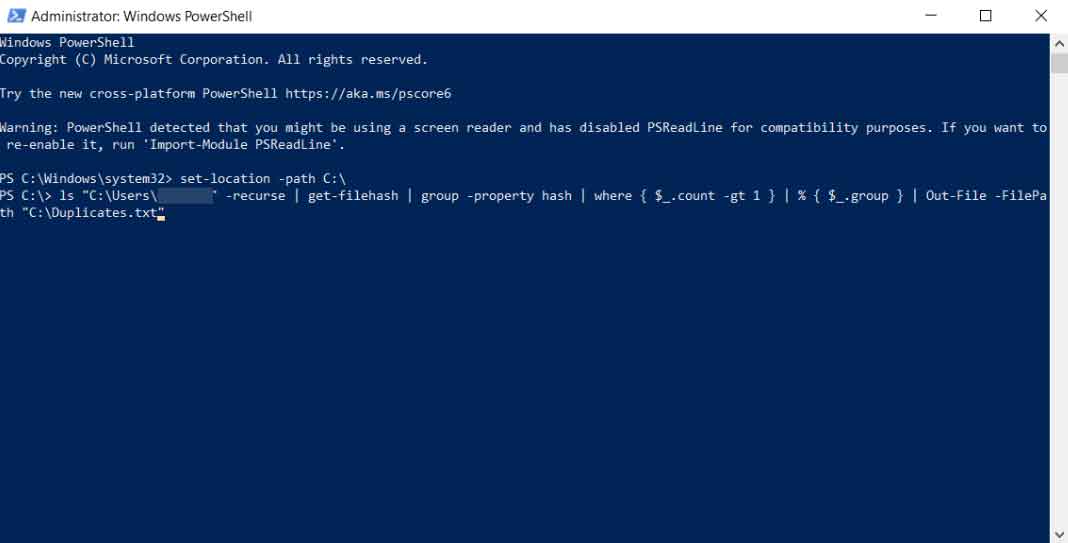
3. Paste the common and replace the result and search files with the actual ones, then press enter.
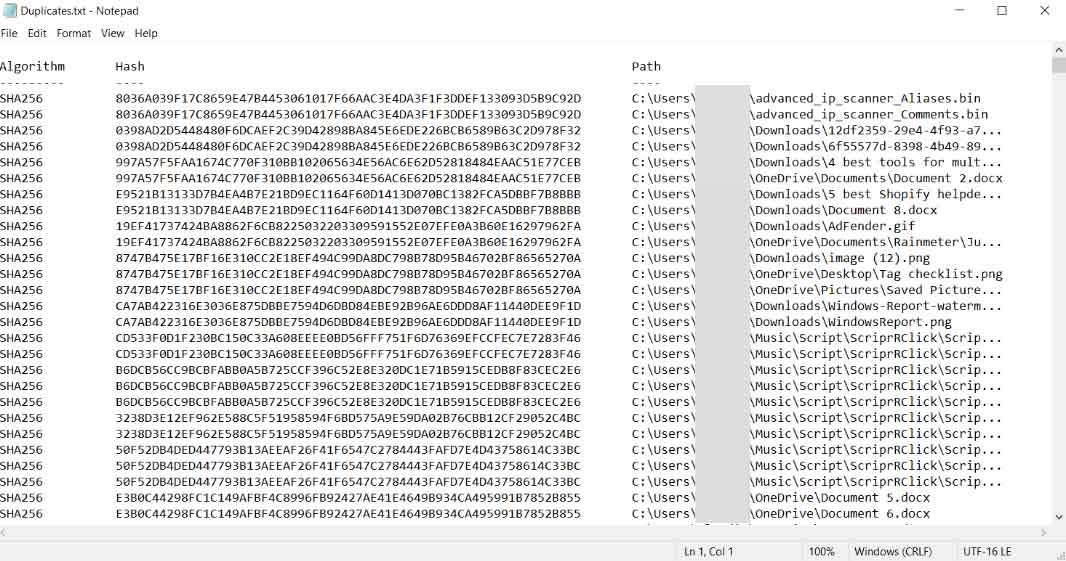
4. The process will take time. When the process is done, then check out the result. Check the location of the duplicate files and delete them manually.
5. You can delete those files automatically. All you have to do is to change the command and replace the search folder with the actual one.
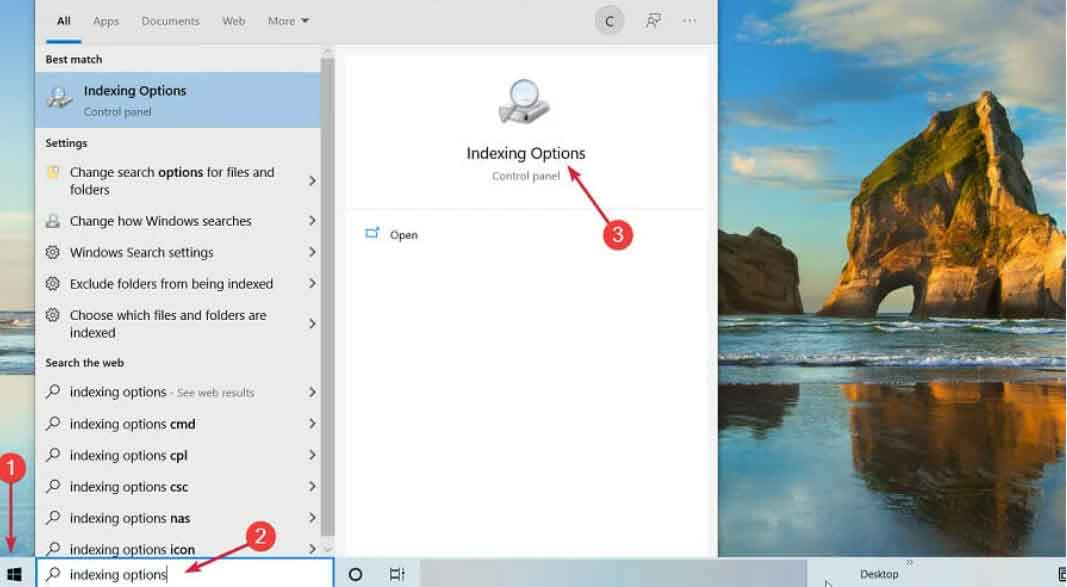
Fix 5: With the File Explorer:
Click the Windows button, type file indexing in the search, and open the result.
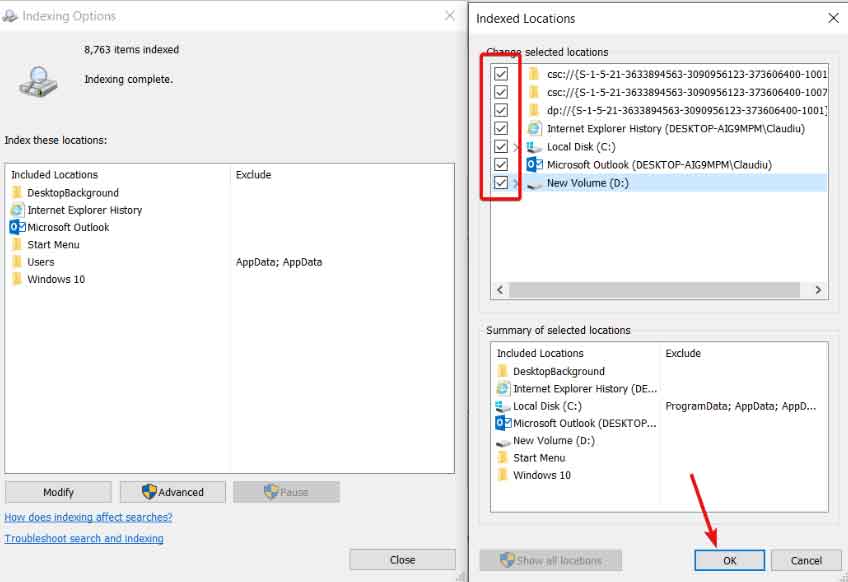
After that, click on the modify button and show all locations on the other tab.

Mark checks all the boxes and clicks the “OK” button on the bottom.
Now open the file explorer and go to your profile using disc C.
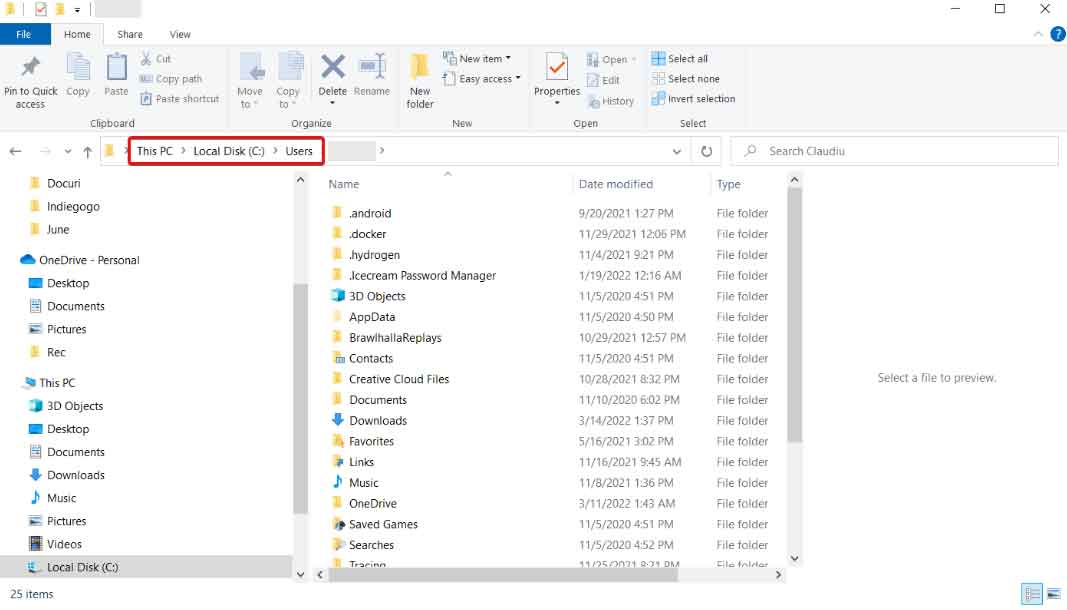
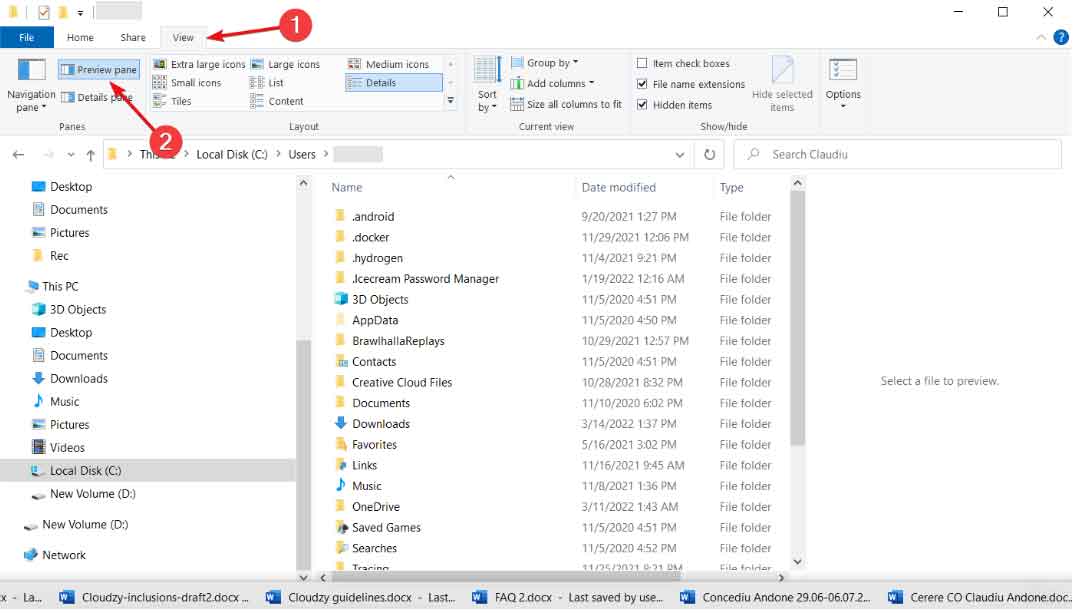
Before doing anything, make a few adjustments. In the top left corner, click on View to select the preview pane.
Then choose details in the layout section.
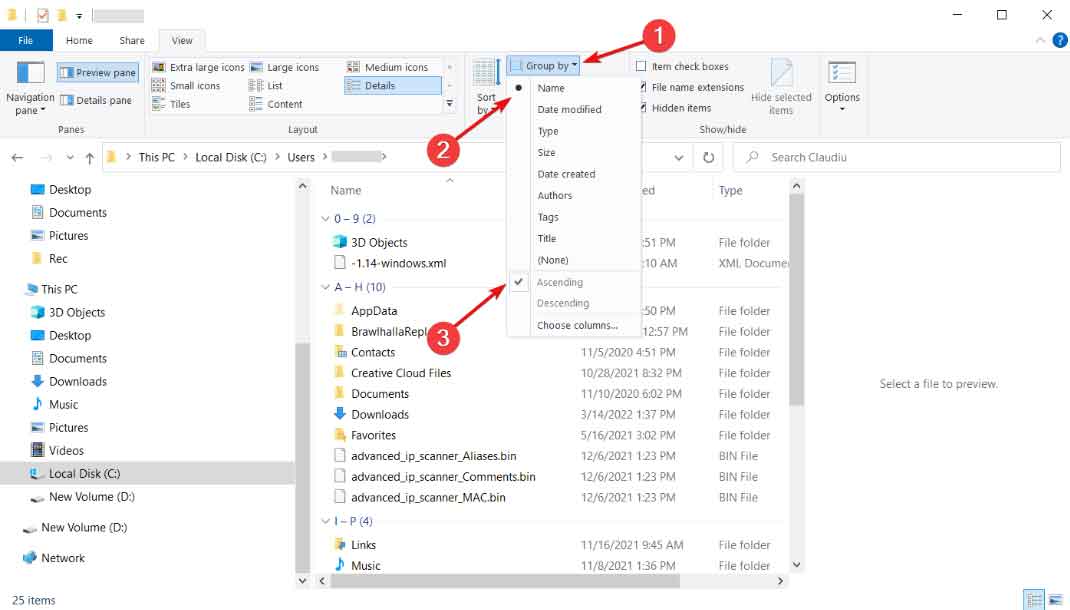
Now in the current view tab, click on the names and then choose to ascend.
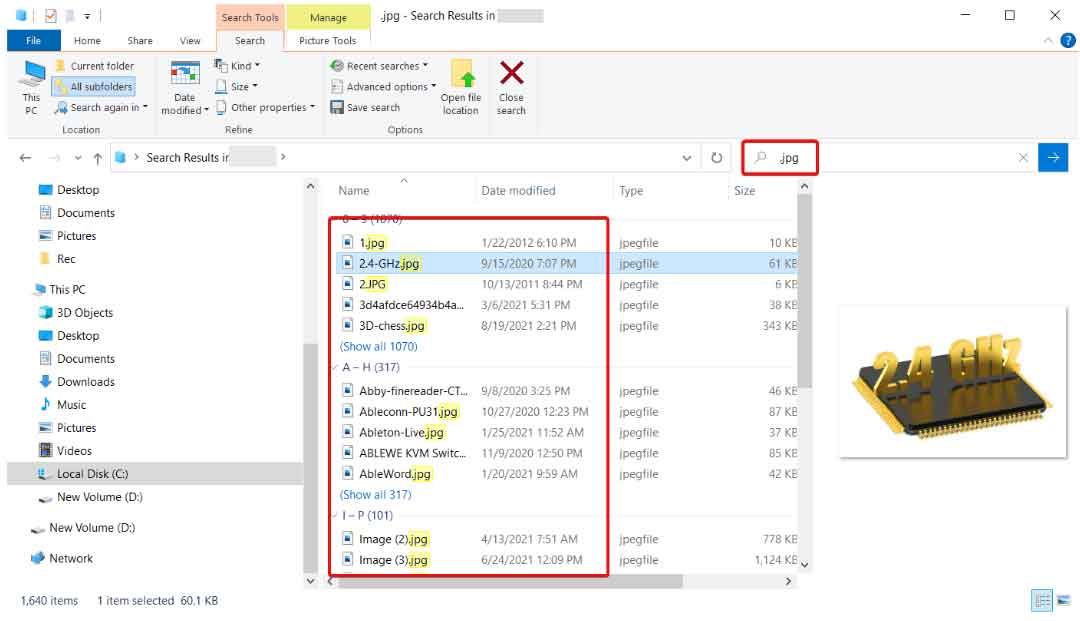
Now just type the file extensions of the files in the top right search bar. The duplicate files will show up.
Part 3: Why do you need Tenshore’s duplicate file deleter?
The overall review clearly suggests prioritizing the Tenshore duplicate file deleter. The reason is that you can delete those files using Windows File Explorer and some other features. Although these ways will take a lot of your time as well, it is not a comprehensive way.
Final Viewpoints
The Tenshore duplicate file deleter provides a better view of duplicating files. Permanently deleting them is a tough job. Sometimes they show errors as well.
All you need is to download the tenorshare duplicate file deleting software. The software eases your processes and deletes those duplicate files. You don’t need any third-party software for it. You can do your work while only using a single tab of tenorshare.